
SharePoint Server 2010 ships with a rich set of functionality for developing Web Content Management solutions. SharePoint 2010 is being bundled with a lot of new features and capabilities. In a typical Web Content Management scenario, there will be Authoring-Productionor Authoring-Staging-Production environment setup. Where in all the content that is visible on the production site is actually added in authoring environment. The content then goes through approval process. Once approved, it will be pushed to the Staging or Production environment (Site). As part of a sample application, I am going to demonstrate one cycle of content management. This can be regarded as a WCM Reference Implementation. This demonstration will include 4 categories.

Branding – Master Page & Custom Style Sheet
Branding is an important part of any site and more often than not client requests for a custom branding. Client will have their own images, color coding & style of displaying information. For this we will have to create custom master page and apply custom style sheet for the same.

For this example, I had downloaded starter masterpages from Randy Drisgill (http://startermasterpages.codeplex.com/).
Step 1. Create an empty SharePoint solution in VS 2010. Add a module to the project. By default Elements.xml and a text file is added to the module. Rename the text file to Publishing.master.

Step 3. Now we have to add custom style sheets and images to the solution. For this add folders to the module and add custom style sheets and images in respective folders.
Step 4. We have to put all these resources (master page, styles & images) at appropriate location on the server. Modify the Elements.xml file accordingly.

Step 5. Now do appropriate modifications to the master page. Add organization logo, add custom styles etc… See below example for adding custom styles.
Error:
Step 6. Now we have to apply new master page to the site. For this create an event receiver for the feature and add below code.

Step 7. Once all the modifications are done, deploy the master page on the server.

Branding – Master Page & Custom Style Sheet
Branding is an important part of any site and more often than not client requests for a custom branding. Client will have their own images, color coding & style of displaying information. For this we will have to create custom master page and apply custom style sheet for the same.

WCM – Branding – Custom master page, images & stylesheets
For this example, I had downloaded starter masterpages from Randy Drisgill (http://startermasterpages.codeplex.com/).
Step 1. Create an empty SharePoint solution in VS 2010. Add a module to the project. By default Elements.xml and a text file is added to the module. Rename the text file to Publishing.master.
Solution structure showing Master Page Module with its resources
Step 2. Open the Publishing.master page and copy paste html markup from starter master page (Randy Drisgill). Step 3. Now we have to add custom style sheets and images to the solution. For this add folders to the module and add custom style sheets and images in respective folders.
Step 4. We have to put all these resources (master page, styles & images) at appropriate location on the server. Modify the Elements.xml file accordingly.

Elements.xml file – this will deploy files at different locations
Step 5. Now do appropriate modifications to the master page. Add organization logo, add custom styles etc… See below example for adding custom styles.
- <cssregistration after="corev4.css" name="/_catalogs/masterpage/PublishingCss/NewStyle.css" runat="server"></cssregistration>
Error:
| Error | Solution |
| In my scenario I wanted to get rid of SharePoint:AspMenu and left navigation. For this I promptly commented this section. But then I figured out the ribbon was not loading. When I click on ‘Page’ or ‘Publish’ empty ribbon would show but it would not load any controls. | These controls (SharePoint:AspMenu & asp:ContentPlaceHolder id="PlaceHolderLeftNavBar" runat="server") must be placed under asp:Panel visible="false" runat="server" This will make these controls not visible on the page but are still available for SharePoint. |
Step 6. Now we have to apply new master page to the site. For this create an event receiver for the feature and add below code.
Feature receiver for applying custom master page to the site
Step 7. Once all the modifications are done, deploy the master page on the server.
Metadata – Site Columns & Content Types
For creating a page layout we need to create a custom content type. And for creating a content type, we need to create custom site columns. Below I will demonstrate how to create custom site columns declaratively.

Step 1. Add empty element to the project. In the elements.xml file you can declare the columns like below. Declarative site columns can also be defined in content type’s Elements.xml file. But for clarity, I have created a new element and declared the site columns in here…


I have created site columns of different types, Text, Choice, Number, Note and URL. For Choice (drop down list) column we can add choices in thetag provided. For displaying image, we can choose a URL column and set the format property to “Image”. This will allow the user to enter the URL of the image.
Step 2. Add Content type element to the project. This content type is based on article page. The ID property is generated by default. We have to set Name, Group, Description, Inherits & Version values.

Step 3. Now in the field refs tag add all the custom site columns already created.
Step 4. Deploy the solution. Now go to site settings and check if all the site columns and content types are available. Also check if all the site columns are available in the custom content type.
The next step is to associate this content type to the page layout and place the site columns on the page layout.

Step 1. Add empty element to the project. In the elements.xml file you can declare the columns like below. Declarative site columns can also be defined in content type’s Elements.xml file. But for clarity, I have created a new element and declared the site columns in here…
Different types of site columns – Text, Choice, Number & Note.
And finally for displaying image… I have created site columns of different types, Text, Choice, Number, Note and URL. For Choice (drop down list) column we can add choices in the
Step 2. Add Content type element to the project. This content type is based on article page. The ID property is generated by default. We have to set Name, Group, Description, Inherits & Version values.

Content Type Elements.xml file with custom site columns added
Step 3. Now in the field refs tag add all the custom site columns already created.
Step 4. Deploy the solution. Now go to site settings and check if all the site columns and content types are available. Also check if all the site columns are available in the custom content type.
The next step is to associate this content type to the page layout and place the site columns on the page layout.
For content publishing we need define how the content should look like. Otherwise each author would start adding content in his own way. And that would look very messy. For this we need to create layouts where we define what all information can be added. In our reference implementation, we will put Product Cover, Category, Price, Description and image. So the author will be able to add information only related to these fields.
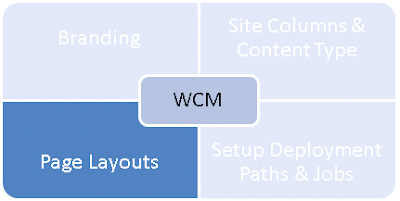
Below I have mentioned steps for creating custom page layout in VS 2010, associating custom content types and finally adding custom site columns to it.
Step 1. Create a new module in the project. Rename the text file to ProductDetailsLayout.aspx.
Step 2. Since we are creating publishing site, we will take blank web part page as base for this page layout. Open ~\ 14\TEMPLATE\FEATURES\PublishingLayouts\PageLayouts\ BlankWebPartPage.aspx and copy all the contents from it. Now paste the contents into the newly created layout page.
Step 3. Now you have to associate the custom content type with the page layout. Open Elements.xml file and add value to some of the properties. We need to put values to Title, ContentType, PublishingPreviewImage & PublishingAssociatedContentType. Define preview image that you are going to use. If you want to have your own image, then add the image to the module. And in the elements.xml file mention where you want to deploy it. The value for PublishingAssociatedContentType is the ID of the custom content type found in Elements.xml file. See below sample Elements.xml file.
Step 4. The next step is to add those custom site columns we had created earlier. But before that we will deploy the solution. Once this is done, open SharePoint designer and open the site. Now go to the custom page layout created just now. Go to view-> task panes ->Tool box. In the tool box under SharePoint controls you can see content fields. Here you will be able to see the custom site columns you had created. Drag and drop each field on to the designer. Rearrange the page as per your needs, remove web part zones if you don’t require them.
Step 5. After rearranging the page in SPD copy the mark up and paste it in the page layout created in VS 2010.
Your page layout creating and deployment is ready now. From the publishing site now you can create a new publishing page and select your custom page layout.
The last piece in the jigsaw is publishing content from authoring portal to production portal.

Below I have mentioned steps for creating custom page layout in VS 2010, associating custom content types and finally adding custom site columns to it.
Step 1. Create a new module in the project. Rename the text file to ProductDetailsLayout.aspx.
Step 2. Since we are creating publishing site, we will take blank web part page as base for this page layout. Open ~\ 14\TEMPLATE\FEATURES\PublishingLayouts\PageLayouts\ BlankWebPartPage.aspx and copy all the contents from it. Now paste the contents into the newly created layout page.
Step 3. Now you have to associate the custom content type with the page layout. Open Elements.xml file and add value to some of the properties. We need to put values to Title, ContentType, PublishingPreviewImage & PublishingAssociatedContentType. Define preview image that you are going to use. If you want to have your own image, then add the image to the module. And in the elements.xml file mention where you want to deploy it. The value for PublishingAssociatedContentType is the ID of the custom content type found in Elements.xml file. See below sample Elements.xml file.
- <module name="ProductDetailsPageLayout" url="_catalogs/masterpage">
- <file ignoreifalreadyexists="FALSE" path="ProductDetailsPageLayout\ProductDetailsLayout.aspx" type="GhostableInLibrary" url="ProductDetailsLayout.aspx">
- <property name="Title" value="Product Details Page Layout"></property>
- <property name="ContentType" value="$Resources:cmscore,contenttype_pagelayout_name;"></property>
- <property name="PublishingPreviewImage" value="~SiteCollection/_catalogs/masterpage/PublishingImages/ProductDetailsPageLayout.png, ~SiteCollection/_catalogs/masterpage/PublishingImages/ProductDetailsPageLayout.png"></property>
- <property name="PublishingAssociatedContentType" value=";#Product Details Content Type;#0x010100C568DB52D9D0A14D9B2FDCC96666E9F2007948130EC3DB064584E219954237AF3900242457EFB8B24247815D688C526CD44D006ffb22da92be4e3984b8c506b023c848;#"></property>
- </file>
- </module>
Step 4. The next step is to add those custom site columns we had created earlier. But before that we will deploy the solution. Once this is done, open SharePoint designer and open the site. Now go to the custom page layout created just now. Go to view-> task panes ->Tool box. In the tool box under SharePoint controls you can see content fields. Here you will be able to see the custom site columns you had created. Drag and drop each field on to the designer. Rearrange the page as per your needs, remove web part zones if you don’t require them.
Step 5. After rearranging the page in SPD copy the mark up and paste it in the page layout created in VS 2010.
Your page layout creating and deployment is ready now. From the publishing site now you can create a new publishing page and select your custom page layout.
The last piece in the jigsaw is publishing content from authoring portal to production portal.
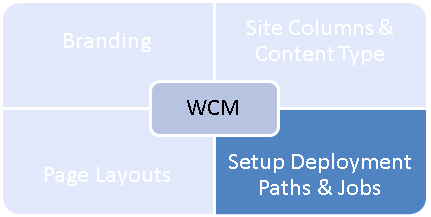
Content deployment is a feature of Microsoft SharePoint Server 2010 that you can use to copy content from a source site collection to a destination site collection. Now that we have a authoring (publishing) site which is configured with custom master page, style sheet, site columns, content type and page layout, we have to configure content deployment paths and jobs which will transfer these artifacts to the production site. The content deployment jobs in Central Administration will also deploy pages (checked in & approved) created from the custom page layout to the destination site.

Below we will walk through content deployment process beginning with creation of destination site.
Step 1. We need to create destination (production) site. In MOSS days, one would create blank site as the production site. Since MOSS CA content deployment jobs used to allow deployment to be done from publishing (authoring) site to blank (production) site, everything was ok. But in SharePoint 2010 if the destination site is created with blank/publishing templates, you would get a nasty error. I have described about the error in the errors section below.
So while creating site collection at destination web application, we need to select ‘Custom’ -‘select template later’ option.
Step 2. The destination CA must be configured to accept incoming content deployment jobs. For configuring this, go to Central Administration -> General Application Settings -> Configure content Deployment. Select ‘Accept incoming content deployment jobs’ and click ok.
Step 3. Now for creating content deployment paths and jobs, go to CA -> General Application Settings -> Configure Content Deployment Paths and Jobs. Specify source and destination web application & site collection.
Step 4. Create a new job for content deployment. Specify the path and frequency of deployment.
Once the deployment is successful you can see the status & verify by opening the destination site.
Error:
This completes the cycle of WCM. I am sure you would agree with me that there is much much more to WCM than the steps described earlier. But as the case with everything, starting steps are always smaller…
Below we will walk through content deployment process beginning with creation of destination site.
Step 1. We need to create destination (production) site. In MOSS days, one would create blank site as the production site. Since MOSS CA content deployment jobs used to allow deployment to be done from publishing (authoring) site to blank (production) site, everything was ok. But in SharePoint 2010 if the destination site is created with blank/publishing templates, you would get a nasty error. I have described about the error in the errors section below.
So while creating site collection at destination web application, we need to select ‘Custom’ -‘select template later’ option.
Step 2. The destination CA must be configured to accept incoming content deployment jobs. For configuring this, go to Central Administration -> General Application Settings -> Configure content Deployment. Select ‘Accept incoming content deployment jobs’ and click ok.
Step 3. Now for creating content deployment paths and jobs, go to CA -> General Application Settings -> Configure Content Deployment Paths and Jobs. Specify source and destination web application & site collection.
Step 4. Create a new job for content deployment. Specify the path and frequency of deployment.
Once the deployment is successful you can see the status & verify by opening the destination site.
Error:
| Error | Solution |
| Unknown server tag 'SharePointWebControls:TextField' | In PageLayout the Microsoft.SharePoint.WebControls was registered like: %@ Register Tagprefix="SharePointWebControls" Namespace="Microsoft.SharePoint.WebControls" Assembly="Microsoft.SharePoint, Version=14.0.0.0, Culture=neutral, PublicKeyToken=71e9bce111e9429c" % And in the master page it was registered as: %@ Register Tagprefix="SharePoint" Namespace="Microsoft.SharePoint.WebControls" Assembly="Microsoft.SharePoint, Version=14.0.0.0, Culture=neutral, PublicKeyToken=71e9bce111e9429c" % There was a difference in tag prefix, and hence SharePoint was unable to parse. I changed the tag prefix in page layout to “SharePoint”. It started working. Another noticeable aspect was VS 2010 was not deploying the modified page layout. May be because of cache. I deleted the page layout from gallery, closed VS 2010 and reopened it again. This time the deployment was successful and page layout started working well. |
| Content Publishing job from Central Administration throws the below error (ULS) A list, survey, discussion board, or document library with the specified title already exists in this Web site. Please choose another title. | I had created a publishing portal for authoring and a publishing portal for publishing (internet facing). And hence the items were colliding. One of my expert friend told me that the publishing (internet facing) site must be blank site and not a publishing site again. It made sense to me. Because you won’t do any “publishing” (content upload, approval, versioning etc…) activities on internet facing production site. So I deleted my current publishing portal and created a new blank site. But again, this is how it used to work in MOSS 2007. In SharePoint 2010, when creating destination site collection, you need to choose template as ‘Custom’ - 'select template later…' . |
| SharePoint:TextField or SharePointWebControls:TextField Control vanishes from the page created from page layout | Not found solution for this yet. If you know, please leave a comment |
This completes the cycle of WCM. I am sure you would agree with me that there is much much more to WCM than the steps described earlier. But as the case with everything, starting steps are always smaller…
No comments:
Post a Comment